Prepare for a culinary adventure with the steps for homemade Turkish bread, unraveling the secrets to mastering this pillowy delight.
 Add to Recipe Book
So, you’ve decided to start on the journey of making your own homemade Turkish bread. The process may seem intricate, but fear not; with the right guidance, you’ll soon be savoring the warm, pillowy goodness of freshly baked bread. From the initial mixing of the dough to the final golden-brown loaf emerging from the oven, each step holds its own importance in creating this delectable treat. Stay tuned to uncover the secrets behind crafting the perfect Turkish bread that will elevate your culinary skills to new heights.
Ingredients Needed
For making homemade Turkish bread, you’ll need a handful of essential ingredients that bring out the authentic flavors and textures of this traditional delight. To start, you’ll need all-purpose flour, which forms the base of the dough. Make sure to use high-quality flour for the best results. Yeast is another pivotal component; opt for active dry yeast for that perfect rise and soft texture.
When it comes to flavor variations, consider adding a touch of honey or molasses to the dough for a hint of sweetness. You can also sprinkle sesame seeds or nigella seeds on top before baking to enhance the taste and visual appeal of the bread.
Baking tips are essential for achieving that fluffy yet chewy texture. Make sure to knead the dough thoroughly to develop the gluten properly. Additionally, letting the dough rise in a warm, draft-free spot is crucial to a light and airy bread.
For presentation ideas, consider shaping the bread into knots or twists before baking for an attractive look. Serving suggestions include pairing the Turkish bread with dips like hummus or baba ghanoush, or using it to make delicious sandwiches filled with fresh veggies and grilled meats.
Enjoy the warm, homemade goodness of Turkish bread with these tips and ideas!
Mixing the Dough
To achieve the perfect texture and flavor in your homemade Turkish bread, start by thoroughly blending the dough until it reaches a smooth and elastic consistency. The blending stage is vital as it sets the foundation for your bread-making journey.
Here are some essential tips to make sure your dough is mixed to perfection:
- Choose the Right Blending Bowl Size: Select a blending bowl that provides ample space for the dough to expand as you mix it. This will prevent spillage and make it easier to incorporate all the ingredients evenly.
- Accurate Flour Measurements: Precise measurements of flour are key to achieving the ideal dough consistency. Too much flour can result in a dense loaf, while too little can make the dough sticky and hard to work with. Use a kitchen scale or fluff the flour before scooping to confirm you’re using the right amount.
- Consistency is Key: Aim for a dough that’s soft, slightly tacky, and smooth. It should easily come together without being too sticky or too dry. Adjust the flour or liquid as necessary to reach the desired consistency.
- Blending Techniques: Use a sturdy spoon or a stand mixer with a dough hook attachment to mix the ingredients. Stir the mixture until all the flour is incorporated, then knead the dough until it becomes elastic and springs back when pressed.
Following these tips will set you on the right path to creating delicious homemade Turkish bread.
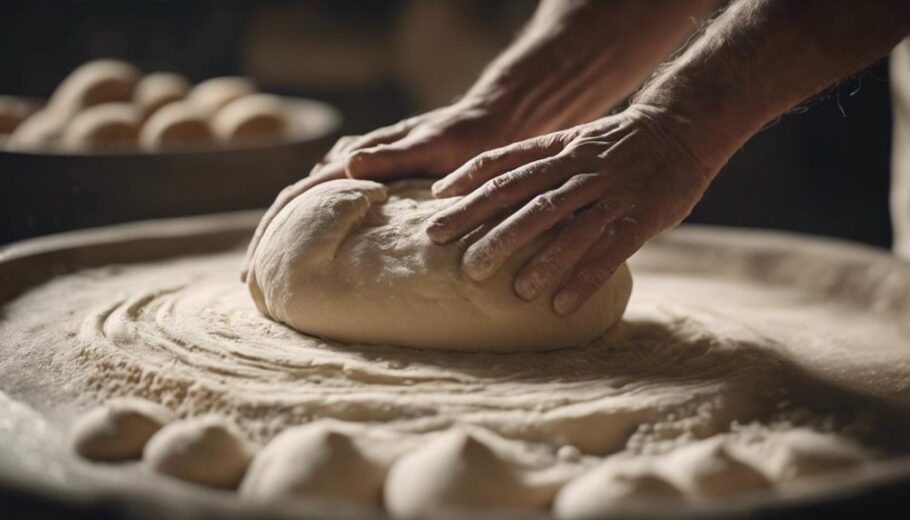
Kneading the Dough
Ensure your homemade Turkish bread turns out perfectly by mastering the art of kneading the dough with precision and care. Kneading is an essential step that influences the final texture and taste of your bread. Achieving the right dough consistency and using proper kneading techniques are key factors in the success of your homemade Turkish bread.
When kneading the dough, focus on achieving a smooth and elastic texture. This can be accomplished by using the heel of your hand to push the dough away from you, then folding it back over itself. Repeat this motion, turning the dough as you go, until it becomes supple and stretchy. Proper kneading helps develop the gluten in the dough, giving the bread structure and allowing it to rise properly during the fermentation process.
To help you visualize the process better, here’s a helpful table outlining the key aspects of kneading the dough:
| Dough Consistency | Kneading Technique |
|---|---|
| Smooth and elastic | Use the heel of your hand |
| Push the dough away and fold | |
| Repeat, turning the dough |
Mastering the kneading process sets the foundation for a successful homemade Turkish bread. Remember, the dough rising and fermentation process that follows relies heavily on the quality of your kneading technique.
Letting the Dough Rise
Achieving the right dough consistency through proper kneading sets the stage for the next essential step: allowing the dough to rise. This phase is pivotal in developing the flavor, texture, and structure of your homemade Turkish bread. Here’s how you can guarantee a successful rise:
- Dough Rising, Timing: After kneading the dough, transfer it to a lightly oiled bowl. Cover the bowl with a damp kitchen towel or plastic wrap. Let the dough rise at room temperature for about 1 to 2 hours, or until it has doubled in size. The exact time may vary based on factors like yeast activity and room temperature.
- Dough Rising, Temperature: The ideal temperature for dough rising is around 75-85°F (24-29°C). Too cold, and the yeast will be sluggish, leading to a longer rise time. Too warm, and the dough might rise too quickly, affecting the flavor and structure of the bread. Find a warm, draft-free spot in your kitchen for the best results.
- Monitoring the Rise: Keep an eye on the dough during the rising process. You want it to double in size, indicating that the yeast has been active, and the gluten has developed sufficiently. A properly risen dough will be airy, light, and full of flavor.
- Testing for Readiness: To check if the dough has risen enough, gently poke it with your finger. If the indentation remains, the dough is ready to be shaped. If it springs back, it needs more time to rise.
Guaranteeing the dough rises correctly is an essential step in creating delicious, fluffy Turkish bread. By paying attention to timing and temperature, you’ll be on your way to a successful bake.
Shaping the Bread
Crafting the perfect shape for your homemade Turkish bread is an essential step in elevating both its visual appeal and overall texture. When it comes to bread shaping techniques, there are various methods you can employ to achieve the desired result.
One popular technique is the traditional round shape, where you gently shape the dough into a smooth ball, creating a classic look for your Turkish bread. Another technique involves rolling the dough into an elongated oval shape, perfect for sandwiches or dipping into hummus.
To master these bread shaping techniques, remember to handle the dough gently to avoid deflating it. Use dough shaping tips such as lightly flouring your hands to prevent sticking and creating a smooth surface. Experiment with different shaping variations like braiding the dough for a more intricate design or forming small individual rolls for a unique presentation.
Having the right bread shaping tools can also make a significant difference in achieving professional-looking results. Consider using a bench scraper to divide and shape the dough neatly, or a bread lame to score decorative patterns on the surface before baking.
Embrace the art of shaping your homemade Turkish bread, as it adds a personal touch and enhances the overall experience of baking fresh bread from scratch.
Preparing the Oven
Now, let’s get that oven prepped for the star of the show – your homemade Turkish bread. Start by setting your oven to the ideal temperature, ensuring that it’s nice and toasty for your dough.
Preheating is key to achieving that perfect crust and airy interior, so don’t skip this vital step.
And don’t forget your baking equipment – a sturdy baking stone or sheet pan will help you achieve that authentic Turkish bread texture.
Oven Temperature Settings
To guarantee the perfect texture and flavor of your homemade Turkish bread, preheat your oven to 450°F for at least 30 minutes before baking. Getting the oven temperature settings just right is essential for achieving that authentic taste and soft, fluffy texture.
Here’s what you need to know:
- Preheat to Perfection: Set your oven to 450°F and allow it to preheat for a minimum of 30 minutes. This ensures that the oven reaches the ideal temperature for baking your Turkish bread.
- Consistency is Key: Pay attention to your dough consistency. The dough should be smooth, elastic, and slightly sticky to the touch. This will result in a light and airy bread once baked.
- Time for Proofing: Give your dough enough time to proof. The proofing process allows the dough to rise and develop flavor. Follow the recommended proofing time for the best results.
- Bake with Precision: Once your oven is preheated and your dough is proofed, bake your Turkish bread for the specified time. This will help you achieve the perfect golden crust and soft interior.
Preheating the Oven
Ensure your baking success by attentively preheating your oven to the ideal temperature of 450°F for a minimum of 30 minutes before you start baking your delicious Turkish bread. Preheating is vital for even baking and achieving that perfect crust and texture. Guarantee oven safety by removing any racks or trays that might obstruct the bread from rising properly.
To maintain temperature accuracy, consider investing in an oven thermometer. Ovens can sometimes be off by a few degrees, which can significantly affect the outcome of your bread. Place the thermometer in the center of the oven to get an accurate reading.
Timing adjustments may be necessary based on your oven’s performance. If you notice that your bread is browning too quickly or too slowly, make note of it for future bakes. Additionally, consider rotating the bread halfway through the baking process for even coloring.
Follow these baking tips, and your homemade Turkish bread will come out of the oven looking and tasting perfect.
Baking Equipment Needed
For best baking results when preparing your oven, make certain you have the necessary baking equipment on hand. Here are four essential items you’ll need before baking your delicious homemade Turkish bread:
- Baking Stone: A baking stone helps create a consistent heat source, allowing your bread to bake evenly and develop a crispy crust. It mimics the effects of a traditional brick oven, giving your bread that authentic touch.
- Pizza Peel: A pizza peel is useful for transferring your bread onto the hot baking stone safely. It guarantees that your bread goes into the oven smoothly without deflating or losing its shape.
- Oven Thermometer: To guarantee the correct temperature for baking, an oven thermometer is crucial. Ovens can often have inaccurate readings, affecting your baking techniques and the consistency of your dough.
- Bread Storage Container: Once your Turkish bread is baked to perfection, store it in a bread storage container to maintain its freshness and prevent it from becoming stale too quickly. Proper bread storage is crucial for enjoying your homemade creation for longer periods.
Baking the Bread
Begin by preheating your oven to 450°F to make certain it reaches the ideal temperature for baking the Turkish bread. Achieving the perfect bread texture requires proper baking techniques.
Once your oven is heated, carefully slide the prepared Turkish bread onto a baking stone or a baking sheet lined with parchment paper. This method helps create a crispy crust while keeping the inside soft and airy.
To guarantee the bread bakes evenly, consider rotating the baking sheet halfway through the baking process. This simple technique helps prevent any hot spots in your oven from affecting the overall texture of the bread.
Additionally, lightly spraying water onto the bread before placing it in the oven can help create steam, which contributes to a beautiful crust and a moist interior.
As the bread bakes, you may notice a wonderful aroma filling your kitchen. This aroma is a good indication that your Turkish bread is on its way to perfection.
The baking process usually takes around 15-20 minutes, but keep an eye on it as the exact time may vary depending on your oven.
Mastering the baking techniques for Turkish bread is a rewarding experience that will leave you with a delicious loaf boasting a crispy exterior and a soft, chewy interior.
Checking for Doneness
To ensure your Homemade Turkish Bread is perfectly baked, rely on visual and tactile cues to check for doneness. Here are some important steps to make sure your bread turns out just right:
- Doneness Test: The most reliable method to check if your bread is done is by performing the classic tap test. Gently tap the bottom of the bread—if it sounds hollow, it’s ready. If the sound is dull, it needs more time in the oven.
- Texture Evaluation: Another way to check for doneness is by evaluating the texture of the bread. The crust should be golden brown and firm to the touch, while the inside should be soft but not doughy. Use a skewer to poke the center; if it comes out clean, your bread is likely done.
- Time Check: While time can be a helpful guideline, it’s important to remember that ovens vary. The suggested baking time is a starting point; always rely on visual and tactile cues for the final decision.
- Color Assessment: The color of your bread can also indicate doneness. A perfectly baked Turkish bread should have a deep golden hue all around, signaling that it has been baked to perfection.
Cooling the Bread
Now that your Turkish bread has finished baking, it’s time for the vital step of cooling it properly.
The cooling process is necessary to guarantee that your bread retains its moisture and texture.
Following the right cooling method and storage recommendations will help preserve the deliciousness of your homemade Turkish bread.
Proper Cooling Process
Allow the freshly baked Turkish bread to cool gradually to secure a perfect texture and flavor. Here are some essential steps to secure your bread cools properly:
- Patience is Key: After removing the bread from the oven, resist the temptation to cut or handle it immediately. Let it cool down naturally on a wire rack.
- Covering Method: To prevent the bread from drying out, cover it loosely with a clean kitchen towel or cloth while it cools.
- Protecting the Crust: If you prefer a softer crust, wrap the bread in a clean kitchen towel immediately after removing it from the oven. This will help retain moisture.
- Serving Freshness: For the best flavor and texture, serve the Turkish bread warm or at room temperature. It pairs wonderfully with olive oil, hummus, or as a side to your favorite Mediterranean dishes.
Storage Recommendations
As your freshly baked Turkish bread finishes cooling down, ensuring it stays fresh and delicious for longer involves proper storage techniques.
To maintain the bread’s freshness, preserving its taste and quality requires storing it correctly. Once your bread has cooled completely, wrap it tightly in a clean, dry cloth or paper towel. This will help to absorb any excess moisture on the surface of the bread, preventing it from becoming soggy.
For long-term storage, freezing is a great option. Slice the bread into manageable portions and place them in airtight freezer bags. Press out any excess air before sealing the bags to prevent freezer burn.
When you’re ready to enjoy your Turkish bread, simply remove it from the freezer and let it thaw at room temperature. You can also reheat the bread in the oven for a few minutes to restore its freshness and crispiness.
Serving and Enjoying
How can you enhance your experience with homemade Turkish bread to truly savor its flavors and textures? Serving and enjoying this delicious bread is an art that involves cultural traditions and delightful flavor pairings.
Here are four ways to make the most of your homemade Turkish bread:
- Traditional Turkish Spread: Embrace the cultural traditions by serving your Turkish bread with classic spreads like hummus, baba ghanoush, or muhammara. These flavorful dips complement the chewy texture of the bread and add a depth of taste that will transport you to the streets of Istanbul.
- Mediterranean Mezze Platter: Create a vibrant mezze platter with olives, feta cheese, tomatoes, cucumbers, and fresh herbs. Pairing these colorful and fresh ingredients with your Turkish bread will elevate the experience, offering a balanced mix of flavors that will leave your taste buds dancing.
- Grilled Kebabs: Serve your homemade Turkish bread alongside grilled kebabs for a hearty and satisfying meal. The combination of tender, flavorful meat with the soft, pillowy texture of the bread is a match made in culinary heaven.
- Sweet Endings: Don’t forget about dessert! Enjoy your Turkish bread with a drizzle of honey and a sprinkle of cinnamon for a simple yet indulgent treat. The contrast between the sweetness of the honey and the subtle nuttiness of the bread will leave you craving more.
Frequently Asked Questions
How Can I Store Homemade Turkish Bread to Keep It Fresh?
To keep your homemade Turkish bread fresh, store it in a paper bag or bread box at room temperature for up to 2 days.
For longer storage, wrap it tightly in plastic wrap or foil, then place it in the freezer.
When you’re ready to enjoy it again, simply thaw it at room temperature or reheat it in the oven for that freshly baked taste.
This way, your flavorful Turkish bread will stay delicious for days!
Can I Freeze the Dough or Baked Turkish Bread?
When it comes to freezing options for your Turkish bread, you can absolutely freeze both the dough and the baked bread.
If you prefer freshly baked bread every time, freeze the dough after shaping it, then let it thaw and rise before baking.
For those who like the convenience of having baked bread ready to enjoy, freeze the fully baked Turkish bread and simply reheat when needed.
The choice is yours!
What Is the Best Way to Reheat Turkish Bread?
To reheat Turkish bread, the best way is to use the oven method for that crispy exterior and soft inside. Preheat the oven to 350°F, wrap the bread in foil, and heat for about 10 minutes.
If you’re in a hurry, the stovetop method works too. Simply warm a skillet over medium heat and toast the bread for a minute on each side.
Avoid the microwave; it can make the bread soggy, and toaster may not evenly heat it.
Can I Add Herbs or Seeds to the Dough for Flavor?
Adding herbs or seeds to the dough can take your homemade Turkish bread to the next level. By incorporating flavorful additions like fresh herbs or seeds, you can elevate the taste profile of your bread.
Herb-infused dough can bring a wonderful aroma and depth of flavor, while seed variations can add texture and visual appeal. Experiment with different combinations to create unique dough enhancements that suit your taste preferences.
Enjoy the creative process!
How Can I Make Turkish Bread Gluten-Free?
To make Turkish bread gluten-free, you can use gluten-free substitutions like almond flour, rice flour, or tapioca flour instead of traditional wheat flour. These alternative flours can give your bread a unique taste and texture while being safe for those with gluten sensitivities.
Experiment with different combinations to find the perfect mix for your homemade Turkish bread. Enjoy the process of creating a delicious gluten-free version of this classic bread!
Conclusion
Now that you’ve mastered the art of making homemade Turkish bread, you can enjoy the delicious taste and aroma of freshly baked bread right in your own kitchen.
With the right ingredients, technique, and a little patience, you can create a warm, soft, and flavorful bread that will impress your family and friends.
So, roll up your sleeves, get baking, and savor every bite of your homemade Turkish bread creation!


